Snickers and Peanut Butter Muffins

snickers muffins

I love baking muffins. As Nigella Lawson said, the process of making muffin itself is relaxing. Last weekend I re-read my cooking book collections and drooled over Nigella’s ‘How to be a Domestic Goddess’ recipes. So many recipes are waiting to be cooked, but I finally tried out recipe from “Cooking for Kids” chapter. Yes, it’s weekend and it’s time to ‘spoil’ your lil one with sweet treats!

These muffins are seriously, dangerously good. Well, the name says it all 😀 They were ready right after my son woke up from his nap. He tried one and said: “Mummy, it’s good..!” That’s the highest compliment I’ve been waiting for 😀


Ingredients

1 2/3 cups all-purpose flour

6 tablespoons sugar

1 ½ tablespoons baking powder

Pinch of salt

6 tablespoons chunky peanut butter

1/4 cup butter, melted

1 large egg, beaten

3/4 cup milk

3 1/2 full-size (50 gr) Snickers bars, chopped


How to Make

  1. Preheat the oven to 180°C.
  2. Stir together the flour, sugar, baking powder, and salt.
  3. Add the peanut butter and mix until you have coarse crumbs.
  4. In another bowl, mix together the melted butter, egg, and milk, then pour this mixture into flour mixture, stir gently. I will repeat my golden rule in making muffins: DO NOT OVERMIX!
  5. Mix in the chopped Snickers bars, and dollop the batter in prepared and lined muffin tins.
  6. Bake for 20-30 minutes. It’s done when the tops are risen, golden, and firm to touch.
  7. Leave them on the wire rack to cool. Enjoy wholeheartedly!


Hummingbird Bakery Banana Loaf

photo

I loovee baking with bananas, and in my opinion, banana bread, banana muffin, or banana cake actually tastes better the day after it’s baked. My overripe bananas usually end up in a baking tray, transformed into a batch of banana muffins. I’ve already posted about my staple banana muffin recipe here. It’s foolproof, and it’s very good. My blog wouldn’t be complete if I didn’t post about my favourite banana loaf recipe. It’s from Hummingbird Bakery, my food heaven in Notting Hill, London. You could find the original recipe in this book.

Here in Jakarta, brown sugar (I mean the real, imported, brown sugar) is rarely available in the supermarket and the price is very expensive. That’s why sometimes I use palm sugar instead. If you use palm sugar, your banana loaf will be darker (you could see at the photo above), and “stronger”. The brown sugar version, IMHO, gives a milder taste.


Ingredients

  • 270g soft light brown sugar/palm sugar
  • 2 eggs
  • 200g bananas, mashed
  • 280g plain flour
  • 1 tsp baking powder
  • 1 tsp bicarbonate soda
  • 1 tsp ground cinnamon
  • 1 tsp ground ginger
  • 140g unsalted butter, melted


How to Make

  1. Grease a 23x13cm loaf tin and dust with flour, or line the tin with baking parchment. Preheat the oven to 170C.
  2. Put the sugar and eggs in a freestanding electric mixer with a paddle attachment (or use a handheld electric whisk) and beat until well incorporated. Beat in the mashed bananas.
  3. Add the flour, baking powder, bicarbonate soda, cinnamon and ginger to the sugar mixture. Mix it thoroughly until all the dry ingredients have been incorporated into the egg mixture. Pour in the melted butter and beat until all the ingredients are well mixed.
  4. Pour the mixture into the prepared loaf tin and smooth over with a palette knife. Bake in the preheated oven for about 1 hour or until firm to the touch and a skewer inserted in the centre comes out clean. Leave the cake to cool slightly in the tin before turning out to a wire cooling rack to cool completely.


Makes 8-10 slices

Ovomaltine and Skippy Cupcakes: A cheat recipe to fulfil your sugar craving!

IMG_9952

My son definitely has a sweet tooth. No wonder. I bake sweet treats regularly, and there are always chocolate and/or ice cream supplies in my fridge. My fault, I know. But I keep telling to myself that as long as he has balanced diet, it would be fine 😀

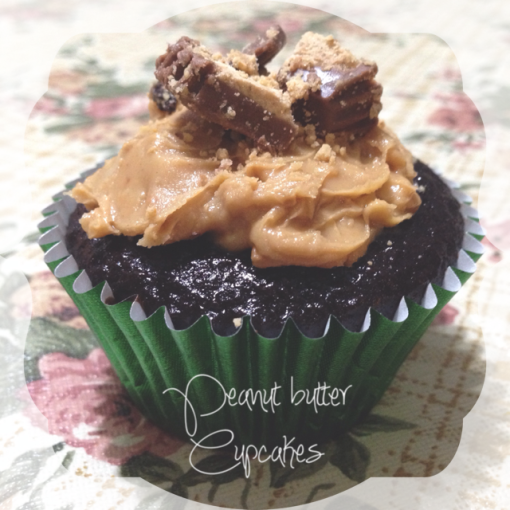
A couple of weeks ago, I was coming home late from my work. I brought some shop-bought chocolate cupcakes for my son as a “late-arriving gift” :D. He ate all of them, happily. The next morning was my day off, so I decided to bake chocolate cupcakes for him. But actually I was too lazy, and too tired also, to make fancy frosting for the cupcakes. So I used this cheat idea to frost the cupcakes. I spread Ovomaltine Crunchy Cream and Skippy “Super Chunk” Peanut Butter as substitutes for the frosting. They have, more or less, same consistency as buttercream frosting, so they would be perfectly fit to be spread on top of the cupcakes. To finish off, I also sprinkled some chopped Ovomaltine Choc Ovo Bars and Reese’s Peanut Butter Cups. These cupcakes look and taste reaaallly good with barely any effort!


Ingredients

–      For chocolate cupcakes ingredients, see here

–      Ovomaltine Crunchy Cream

–      Skippy “Super Chunk” Peanut Butter

–      Ovomaltine Choc Ovo Bars

–      Reese’s Peanut Butter Cups


How to Make

  1. Bake the cupcakes, see here for the method.
  2. Cool the cupcakes on the wire rack. Give them some time to lose their heat, because warm cupcakes will melt the “frosting”.
  3. Spread the cupcakes with Ovomaltine Crunchy Cream or Skippy “Super Chunk” Peanut Butter, whatever you choose. I guess 2-heaped teaspoons will be enough to frost 1 cupcakes.
  4. Sprinkle the chopped chocolates. I use chopped Ovomaltine Choc Ovo Bars for my Ovomaltine cupcakes and chopped Reese’s Peanut Butter Cups for my Skippy cupcakes. Andddd.. you’re done! 😀


IMG_9950


Mamaku Koki Handal and Lock & Lock COOKING CHALLENGE: Classic and Strawberry Tiramisu

IMG_7984

I was beyond happy when my Lock & Lock Glass arrived!! In addition to the heat resistant feature, this versatile glass storage container is equipped with the famous Lock & Lock airtight silicone sealed lid that seal in flavors and keep air out. This revolutionary four-lock mechanism and resilient seal is a perfect way to keep the freshness and hygiene of food (and also zero spillage!!), which is stored inside the container. The lid is also BPA-free, so I don’t have any concerns using this product.

IMG_7989

The first recipe idea using Lock & Lock Glass that came up in my mind is my no-bake tiramisu. I always “assemble” (because the word “bake” is not suitable since it requires no baking whatsoever 😀 ) my no-bake tiramisu in a porcelain container. But my container doesn’t come with the lid. Hence, I always have to cover the container with plastic wrap to maintain the food hygiene and to seal the flavor from fridge odor. Now that the Lock & Lock Glass is provided with airtight lid, I don’t have to use plastic wrap to cover my tiramisu when it’s refrigerated. And there’s one more thing that I looove from this product: Its clear body! I can easily see my beautiful layers of tiramisu with no need to remove the lid. Lock & Lock heat resistant glass also contains low sodium oxide (Na2O), so the surface will remain clear even if it’s frequently used or stored for long periods of time.

Each finalist received Lock & Lock Glass package which contains two 630 ml glass containers. So I decided to make two flavor of tiramisu: classic tiramisu and strawberry tiramisu. Since this tiramisu recipe requires no raw eggs and no alcohol (rum), this is suitable for your little ones (but please consider that this recipe contains dairy products, which are suitable for 1+ year-old).

Ingredients

–       150 ml strong brewed coffee, room temperature

–       150 ml strawberry juice (I prefer homemade strawberry juice since it is so easy to be made. You just need to chop 100 – 150 gram strawberries, blend them with small amount of water until smooth. Pour the strawberry juice into a pan and heat until it starts bubbling. Put enough sugar and water to the juice as you like.)

–       1 tsp rum essence (I don’t use any alcohol in this recipe, but sometimes I want the “flavor” of rum, so I use essence instead. If I make this tiramisu for my kid, I’ll skip this ingredient.)

–       250 gram mascarpone cheese

–       125 gram cream cheese (I like to combine mascarpone and cream cheese because I love the tangy taste of cream cheese)

–       250 ml whipping cream/double cream

–       8 tbsp castor sugar

–       2 packs Italian lady finger

–       cocoa powder

–       100 gram strawberries, thinly sliced

–       50 gram sliced almonds (optional), roast them in moderate oven to give extra flavor and “crunch”


How to Make

  1. Whip the whipping cream with sugar until it forms soft peaks. Refrigerate the whipped cream while preparing the next step.
  2. In another bowl, mix well the mascarpone and cream cheese.
  3. Mix together the cheese mixture and whipped cream until well combined. Since we will make two kind of tiramisu, it will be easier if we split this mixture into two equal parts.
  4. Add the rum essence (if using) into the coffee, mix well and set aside.
  5. Prepare the first Lock & Lock Glass container to assemble the classic tiramisu. Dip both sides of the lady fingers into coffee mixture. Remove the lady fingers quickly (as they get soften really quick) and arrange the soaked lady fingers in the bottom of Lock & Lock Glass container. Spread enough amount of cheese mixture to cover the lady fingers. Repeat steps for second layer. You may have two or three layers as you like, just remember that you have to have the cheese mixture on top of your layer. Dust the top layer (cheese mixture) with cocoa powder.
  6. Then prepare the second Lock & Lock Glass container to assemble the strawberry tiramisu. Dip both sides of the lady fingers into strawberry juice. Remove the lady fingers quickly and arrange the soaked lady fingers in the bottom of Lock & Lock Glass container. Spread enough amount of cheese mixture to cover the lady fingers. Arrange sliced strawberries to cover the cheese layer. Repeat steps for second layer. You may have two or three layers as you like, but you have to have the cheese mixture on top of your layer. Sprinkle the top layer (cheese mixture) with sliced almonds (if using), or you can decorate with sliced strawberries.
  7. Put on the silicone lids to the Lock & Lock Glass containers, and refrigerate them at least 8-10 hours to let the flavors blend.


classic tiramisu

classic tiramisu

Strawberry Tiramisu

Strawberry Tiramisu

Check out the cooking demo here! 😉

Bananamisu

bananamisu

This recipe is basically my tiramisu recipe with a little twist 😉 . I replaced the cream cheese with banana puree. Why banana? Because in my opinion, banana puree has, more or less, same consistency with cream cheese (and simply because I am so bored baking banana muffins when I have ripe bananas around 😀 ). And what goes together better than banana and chocolate? That’s why I substituted the coffee mixture with chocolate mixture for the lady fingers’ dipping. I call this as “Bananamisu”. It’s an abbreviation from Banana-Tiramisu anyway 😀

Try using very ripe bananas because this is a “no-bake” recipe, so you want the sweetness of ripe bananas in your Bananamisu.

Ingredients

For Bananamisu:

–       250 gr mascarpone cheese

–       250 gr very ripe bananas (It’s about 2 to 3 bananas)

–       250 ml whipping cream/double cream

–       ¼ cup icing sugar, or to taste (It depends on how sweet your banana is)

–       ½ tsp vanilla extract

–       28 pcs lady finger biscuits

–       unsweetened cocoa powder, for dusting

For Chocolate Mixture (for dipping):

–       4 tbsp of unsweetened cocoa powder

–       4 tbsp of icing sugar

–       2/3 cup of boiling water

–       2 tsp rum essence (optional)

How to Make

  1. Whip the whipping cream until it forms soft peaks. Refrigerate the whipped cream while preparing the next step.
  2. In a separate bowl, lightly mash the bananas with ¼ cup icing sugar to make banana puree.
  3. Mix well the mascarpone, whipping cream, and vanilla extract. Add the banana puree and mix until smooth and well combined.
  4. Mix 4 tbsp cocoa powder, 4 tbsp icing sugar, rum essence (is using) and boiling water in a separate bowl until cocoa has dissolved.
  5. Dip both sides of the lady fingers into chocolate mixture. Remove the lady fingers quickly (as they get soften really quick) and arrange the soaked lady fingers in bottom of your prepared dish.
  6. Spread enough amount of cheese and banana mixture to cover the lady fingers.
  7. Repeat steps for second layer. You may have two or three layers depends on how big your dish is. Just remember that you have to have the cheese and banana mixture on top of your layer.
  8. Dust the top layer (cheese and banana mixture) with cocoa powder.
  9. Cover and refrigerate at least 8-10 hours to let the flavors blend.

Note

This bananamisu won’t last long though you keep it in a fridge, because it contains “no-bake” fresh banana puree.

White Chocolate Strawberry Tiramisu

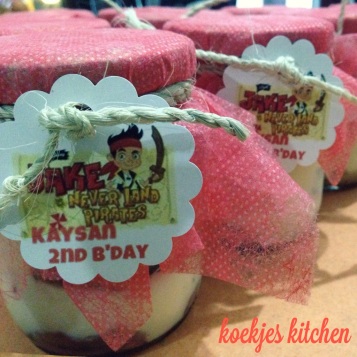
strawberry tiramisuMy son had his 2nd birthday last September. Oh how fast time flies, how fast he grows. For me, he is forever a baby 😀 He had already entered preschool since last August, so it was his first birthday bash at school. I wanted something personal to be the goodie bags, something sweet like..cakes! (well, the only thing I can do is baking of course, I am no good at crafting or whatsoever :D)

At first I wanted to make cute, personalised cupcakes, but it would take so much time (for me). Since I started to work again, it was not an option to make fancy cupcakes for the goodie bags. So I decided to make cake in a jar.. and the next question was.. what kind of cake? I thought my tiramisu would be easy to be made (since it requires no baking!), but hey.. not every parents would let their kids to eat cakes using coffee as one of the ingredients. That’s why I came up with this recipe. It used the same amount of lady fingers, mascarpone, cream cheese, and whipped cream, but I substituted coffee with homemade strawberry juice and also used sliced strawberries within layers. I also used melted white chocolate to give the cake “extra” flavour (in the other hand, I cut down the amount of sugar :)). My mom called this cake as a “strawberry cheesecake” because it tasted like one. But I prefer to call it “tiramisu” because it contains lady fingers and mascarpone cheese. Well, you may call it whatever you like 😀

Ingredients

–       200 ml strawberry juice (I prefer homemade strawberry juice since it is so easy to be made. You just need to chop 250-300 gr strawberries, blend them with small amount of water until smooth. Pour the strawberry juice into a pan and heat until it starts bubbling. Put enough sugar and water to juice as you like.)

–       250 gr strawberries, thinly sliced

–       250 gr mascarpone cheese

–       125 gr cream cheese

–       250 ml whipping cream/double cream

–       125 gr white chocolate, melted, room temperature

–       4 tbsp castor sugar

–       2 tsp vanilla extract

–       28 pcs lady finger biscuits

–       sliced almonds (optional), roast them in moderate oven to give extra flavor and “crunch”

How to Make

  1. Whip the whipping cream with sugar and vanilla extract until it forms stiff peaks (I prefer to make it “stiff” because it will be mixed with “runny” melted white chocolate). Refrigerate the whipped cream while preparing the next step.
  2. In another bowl, mix well the mascarpone and cream cheese.
  3. Mix together the cheese mixture, whipped cream, and melted white chocolate until well combined.
  4. Dip both sides of the lady fingers into strawberry juice. Remove the lady fingers quickly (as they get soften really quick) and arrange the soaked lady fingers in bottom of your prepared dish.
  5. Spread enough amount of cheese mixture to cover the lady fingers.
  6. Arrange sliced strawberries to cover the cheese layer.
  7. Repeat steps for second layer. You may have two or three layers depends on how big your dish is. Just remember that you have to have the cheese mixture on top of your layer.
  8. Sprinkle the top layer (cheese mixture) with sliced almonds (if using), or you can decorate the cake with sliced strawberries (just like I did in the photo).
  9. Cover and refrigerate at least 8-10 hours to let the flavors blend.
the goodie bags

the goodie bags

No-bake, No-egg, No-alcohol Tiramisu

Who doesn’t love tiramisu? This sweet treat is my family favorite, including my 2 year-old son. Considering the ingredients of shop-bought tiramisu (raw eggs and rum), which are not very suitable for little kid, I tried to make it myself using no eggs and no alcohol. Turns out this is the easiest way to make tiramisu since it requires no baking whatsoever 😀

If you find that using coffee in tiramisu is too “strong” for your kids, simply substitute it with chocolate milk. I will put my little note in each ingredient if you want to make it “more” kid-friendly :D.


Ingredients

–       200 ml strong brewed coffee/espresso, room temperature (If I make the  tiramisu for my kid, I substitute the coffee with 200 ml of chocolate milk.)

–       2 tsp rum essence (I don’t use any alcohol in this recipe, but sometimes I want the “flavor” of rum, so I use essence instead. If I make the tiramisu for my kid, I’ll skip this ingredient.)

–       250 gr mascarpone cheese

–       125 gr cream cheese (I like to combine mascarpone and cream cheese because I like the tangy taste of cream cheese. Mascarpone is quite bland for me.)

–       250 ml  whipping cream/double cream

–       8 tbsp castor sugar

–       28 pcs lady finger biscuits

–       cocoa powder


How to Make

  1. Whip the whipping cream with sugar until it forms soft peaks. Refrigerate the whipped cream while preparing the next step.
  2. In another bowl, mix well the mascarpone and cream cheese.
  3. Mix together the cheese mixture and whipped cream until well combined.
  4. Add the rum essence (if using) into espresso, mix well.
  5. Dip both sides of the lady fingers into coffee mixture. Remove the lady fingers quickly (as they get soften really quick) and arrange the soaked lady fingers in bottom of your prepared dish.
  6. Spread enough amount of cheese mixture to cover the lady fingers.
  7. Repeat steps for second layer. You may have two or three layers depends on how big your dish is. Just remember that you have to have the cheese mixture on top of your layer.
  8. Dust the top layer (cheese mixture) with cocoa powder.
  9. Cover and refrigerate at least 8-10 hours to let the flavors blend into that classic tiramisu taste you know and crave.  Don’t eat it right away, because you’re going to be disappointed.  Give it time to make the magic happen!

Creamy Oreo Pie

oreo pie

Hey there! Been away from the blog for almost a year :(. Has anyone missed me? 😀  Okay, I promise to myself that I have to post at least one new recipe for a month. Let’s see if it works!

Today is my kind of perfect day to “end” the weekend. Waking up slowly, late breakfast, nothing to do, DVD marathon, and yes… lazy weekend baking! And what I mean “lazy” is making good use of the fridge and having a wonderful dessert on the table with no baking required 😀

I found the original recipe here, but since some of the ingredients are rarely sold in Indonesia, here I made my own adjustment.


Ingredients

36 Oreo Cookies, divided from the cream filling

1/4 cup (56,7 gram) butter or margarine, melted

250 gram Cream Cheese, softened

1/3 cup sugar

2 cups whipping cream/double cream


How to Make

  1. To make the pie crust: Crush 24 cookies to form fine crumbs, mix with melted butter until blended. Press this mixture onto bottom and up side of 9-inch pie plate. Refrigerate the crust while preparing filling.
  2. Chop 8 of the remaining cookies, set aside.
  3. Whip the whipping cream until it forms stiff peaks. Refrigerate the whipped cream while preparing the next step.
  4. Beat cream cheese and sugar with mixer until light and fluffy (about 3 minutes if using electric mixer).
  5. To make the filling: Mix together the whipped cream, cream cheese mixture and chopped oreo cookies, stir gently until blended. Spoon this mixture into the prepared crust.
  6. Refrigerate the pie for 2 hours or until firm.
  7. Halve remaining 4 oreo cookies and insert (cut-edges down) into top of the pie.


Note:

I found that the filling is a lil too much for the pie crust. Next time I will double the amount of the crust and use bigger pie plate.

That so-called “Authentic” Churros Recipe

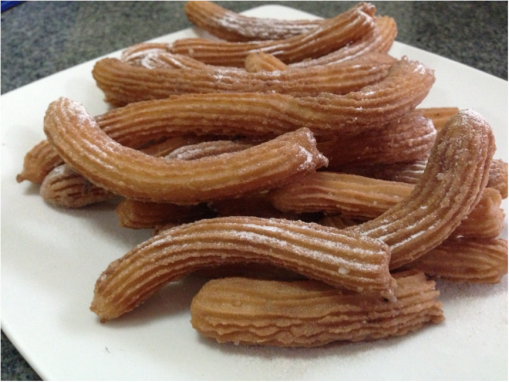
spanish churrosThe first churro I’ve ever tasted is the one from California Churros. Their churros (as far as I can remember) are sweet, light, fluffy, eggy, and have several choice of fillings inside. I was simply in love…and started hunting the perfect recipe to make my own which taste like California Churros. Well I must say that I’ve finally found that perfect recipe (you can see it here). That sweet, light, fluffy, and eggy churros. Yum!

But then I tried another churros sold by several churrerías, and I found different kind of churros. Theirs are crunchy outside and rather chewy inside. No eggy taste, so it such a pleasure to dip it in a hot chocolate sauce, because the churro itself is quite bland. Not that I’m not into it. I’m just too satisfied with my own recipe, my own homemade churros.

And here comes the day when the first churrería opened in Jakarta. Me and husband curiously tried their churros and once again, we met the “crunchy and chewy” version. After munching that tasty snacks, my husband said: “Could you make churros like this?”. Well, for me, it’s time for another hunting of the new recipe!

There are soooo many recipes in internet today when I looked for “authentic”, “spanish” churros. After reading that recipes, and some reviews from the contributors, I came up with the fact that “real churros in Spain are not light and fluffy, but rather chewy inside”. Never been to Spain to prove it, but as most of  churrerías that I’ve tried are selling this chewy version of churros, I choose to believe it :D.

Another fact that I found that there are basically 3 ingredients to make that so-called authentic churros: water, flour, and oil (any vegetable oil will do). No butter, no egg. As simple (and cheap!) as that. I have a thought that churrerías in Spain are more or less like “tukang gorengan” (small street vendors selling fritters) in Jakarta. Instead, making churros is easier than making the perfect banana fritters 😉 .

The recipe below is originally taken from allrecipes.com. But here I made my own adjustment by cutting the amount of sugar and oil. The churro itself will be served with lightly cinnamon-sugar coated, so I didn’t put too much sugar in the batter. And cutting the amount of oil will reduce the chewiness. If you prefer otherwise, go for the original recipe here.

Ingredients

1 cup water

1 tablespoons white sugar

1/2 teaspoon salt

1 tablespoons regular olive oil

1 cup all-purpose flour

2 quarts oil for frying

For coating:

1/2 cup white sugar, or to taste

1 teaspoon ground cinnamon

How to make

  1. In a small saucepan over medium heat, combine water, 1 tablespoon of sugar, salt and 1 tablespoon of olive oil.
  2. Bring to a boil and remove from heat.
  3. Stir in flour until mixture forms a ball. A little note from me, you will face a “tough” batter here, so it will save your energy (a lot!) if you use mixer to do this job. If using mixer, please do not over mix the batter (I suggest 30 seconds is enough to mix them all).
  4. Let the batter cool for a while, then put them in your churrera or piping bag. As this batter is chewy and tough, it’s kinda hard to pipe the batter. Placing small amount of batter in the piping bag will help when you squeeze them out.
  5. Heat oil for frying in deep-fryer or deep skillet. Pipe strips of dough into the hot oil. Fry until golden, drain on paper towels.
  6. Combine 1/2 cup sugar and cinnamon. Roll drained and cool churros in cinnamon and sugar mixture.

Note

The texture of this batter is perfect if you want to freeze them, because it’s not too runny like my previous churros batter here. So it can be piped onto a baking tray which has been lined with greaseproof paper. Arrange the churros in a single layer, cover with clingfilm, and set in the deep freezer. Once frozen, remove churros from the baking tray and store in Ziploc/freezer-safe bags. Return to the freezer and cook from frozen.

PS: I’m sorry to not posting any pics of this churros. Have a morning flight tomorrow, still many things to do! Promise I will update this post with decent photos 😀

Date Muffins

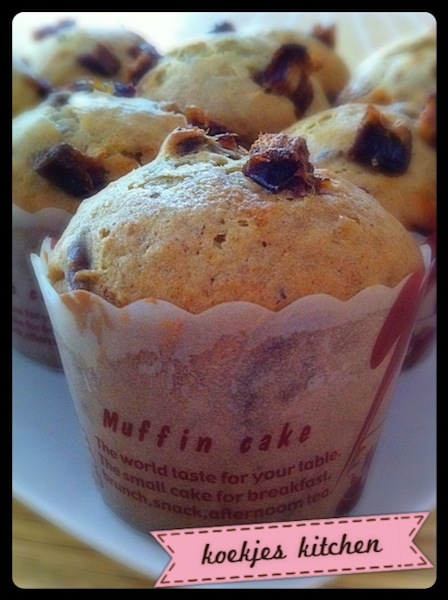
During the fasting month, our home was flooded by dates. Actually, dates are commonly found in fasting month and Eid al-Fitr season. One of my dad’s colleague even gave us a pack of 5 kg dates. Whew! I like dates, but not that much. We’ve already given the dates to our relatives, but still there was too many to be eaten just it is. I decided to bake something using dates. And here is one of them, the easiest one actually.

I got this recipe from nigella.com. It is from Community Recipe, and not original Nigella’s recipe.

When I was looking for my baking utensils, I found these cute muffin paper cups in my drawer. I have no idea when I bought them :D. So, even though the recipe itself is a “cake” recipe, I divided the batter into those cups. The ingredients below are a half batch from the original recipe, except for the dates. I guess 100 grams of dates are not enough to make these muffins delicate and moist.

Ingredients

  • 150 ml milk
  • 200 grams dried dates
  • 100 grams butter
  • 2 eggs
  • 150 grams sugar
  • 337.5 grams cake flour
  • 1/2 tsp bicarbonate of soda
  • 1 tsp baking powder
  • 1 tsp vanilla sugar (or you can use vanilla extract, anyway)

How to Make

  1. Chopped the dried dates and put the dates and the milk into a casserole pan. Heat until the dates soften a bit then take off the heat.
  2. In another pan, add the butter and let it melt, then add the sugar. Stir to combine. Let the mixture cool.
  3. Pour the butter mixture into the dates mixture, then add the eggs one by one. Whisk them well.
  4. Add the dry ingredients that you’ve mixed in another bowl first. Still remember the golden rule of making the best muffins? Do not over-mix the batter! 😀
  5. Spoon the batter into the muffin cups and sprinkle some chopped dates on top. Bake at 180° C for about 20 minutes or until a tester comes out clean.